 MURMURLAYER
GUIDES
Depth, Pose or Line Art: Which Reference Do You Need?
Choose a reference for spatial layout, body posture or visible contours, then check the result against the original before using it elsewhere.
Name the information you want to keep
You may like an image because of a person’s stance, the distance between foreground and background, or the outline of a scene. Those are different things to preserve. Choosing a structural reference without naming the goal can leave you with the wrong information: a depth image when you need an arm position, or a dense contour image when you wanted a simple silhouette.
Murmurlayer offers depth, body pose and line art from an image or an already extracted video frame. Each output describes a different aspect of the source. Keep the original nearby and compare the result with it. The useful question is whether the output retains the structure your next creative step needs.
Choose and inspect a structural reference
1. Start with an input suited to the task
Open the structural reference tool and choose an image, or send a selected frame from Your selects. For depth, look for a clear subject and readable foreground/background relationships. For pose, begin with one person whose whole body is visible and whose limbs are reasonably separated. For line art, notice background textures that may produce unwanted edges. If an important body part is outside the picture, choose a better source before spending time on repeated attempts.
2. Choose depth for near/far layout
A depth map estimates relative distance within the picture. It can help you inspect the separation of a foreground subject, objects behind it and a distant background. It is not a measured distance map or a three-dimensional model you can rotate. After generation, check subject boundaries, overlapping objects and the spatial relationships you care about. Do not interpret one gray value as a fixed number of meters. If a downstream workflow specifies a light/dark convention, check its instructions before using the image.
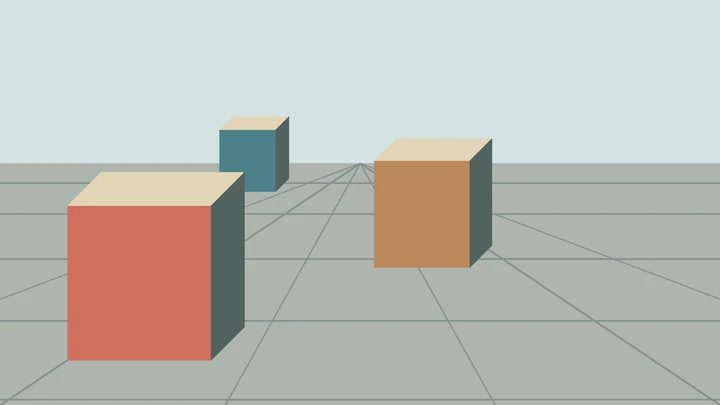
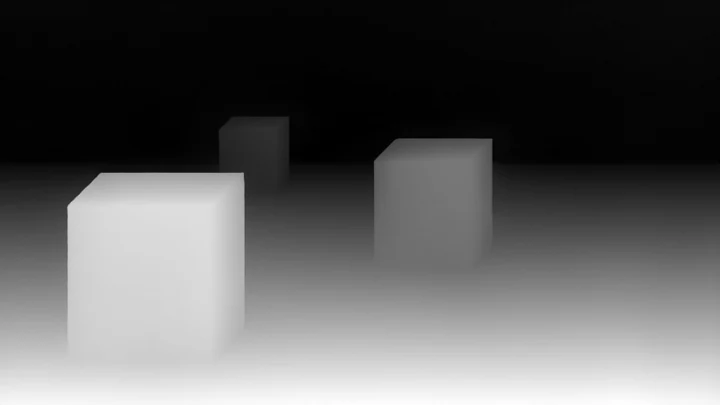
An estimate of relative depth, not measured distance.
3. Choose body pose for posture
Pose defaults to MediaPipe Pose Landmarker Lite, with a model of about 5.8 MB. You can also select the high-precision option, RTMW-X with YOLOX-M, whose model weights total about 470 MB. Both require additional runtime components. Both modes are configured for up to four people, but may miss people or joints, and the output does not include detailed hands or faces. Download and processing times depend on your device and browser; the mode names do not guarantee that one is more accurate for every image. The RTMW-X example below shows the optional mode, not a Lite result.
Review the shoulders, elbows, hips and knees against the source. Check which points belong to each person and whether their connecting lines make sense. Missing lower legs are not necessarily a display crop. A body part may be outside the original frame, hidden, or too uncertain for a visible connection. A stronger model cannot reliably recover the real posture of a leg the camera never recorded. For a complete pose reference, replace the source with a clearer full-body view rather than treating a guessed limb as an observation.
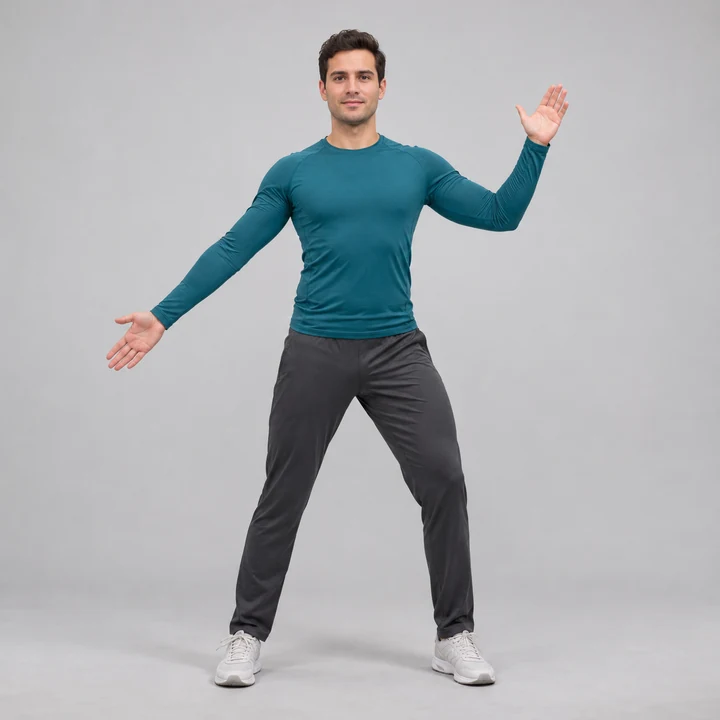
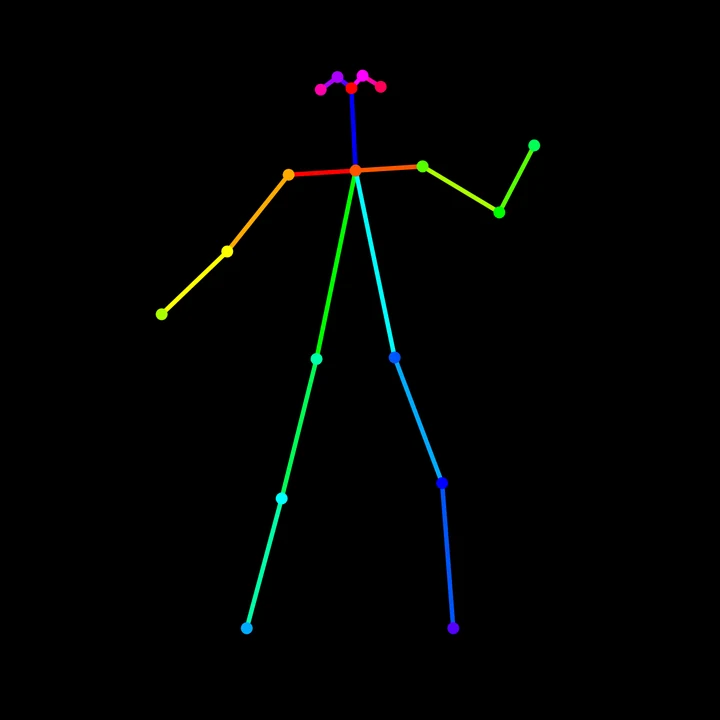
Input and output are 1254 × 1254 px, reduced here. Check shoulders, elbows, hips and knees; detailed fingers and facial landmarks are not included.
4. Choose line art for visible contours
Line art traces visible image edges. It can preserve outlines and internal contours, including edges you may not want, such as clothing patterns and background texture. Line detail ranges from 0 to 100. Comparing 50 and 85 is one way to see the effect on a particular image, not a recommendation that either value is universally best. Increase detail if important contours are missing; reduce it if the output becomes cluttered. Judge the subject and background together.
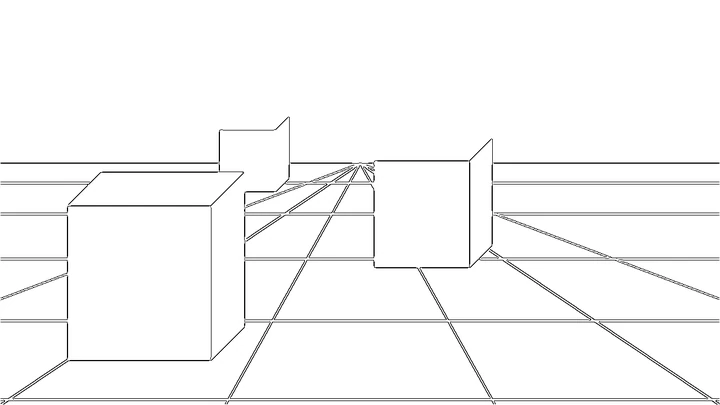
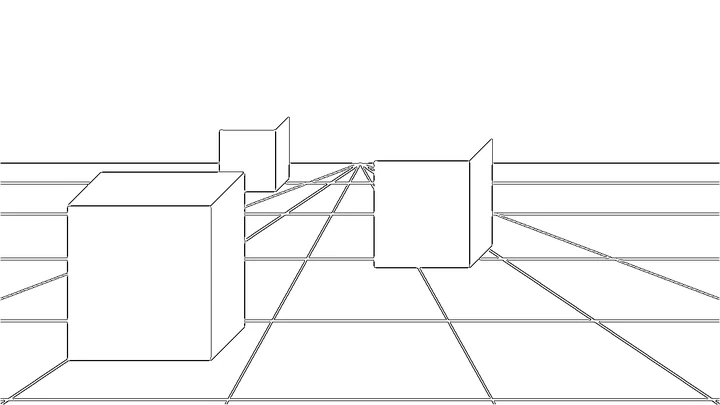
The same geometric input as the depth example above. Higher detail can retain more background edges.
5. Save the image and check the destination workflow
Depth and pose download models on first use; line art uses a contour algorithm. After generating a result, open the saved image and check it against the original at a useful size. Look for broken outlines, incorrectly connected joints or a spatial boundary that moved across the subject. A result file opening successfully does not establish that its interpretation is suitable.
Use the saved image in a creative workflow that accepts the relevant reference type. Check its required format, orientation and control model. Murmurlayer does not directly connect to a generator or guarantee that every depth, pose or line-art model accepts the same map. Begin with a small test in your chosen workflow before building a longer sequence around the reference.
Common mistakes to avoid
- Using body pose to preserve clothing or fine hand gestures. Body connections do not contain those details. Choose additional appropriate references if they matter to the task.
- Treating estimated depth as a measurement. Relative near/far structure cannot tell you the real distance to an object or replace a calibrated capture.
- Assuming more lines mean a better reference. Higher detail may emphasize a busy background as well as the subject. Choose the amount of information your next step needs.
- Passing a result onward without checking the source. An implausible knee connection or incorrect object boundary becomes part of the next input unless you notice it first.